

AgentKit: Connect my agent to apps
Build a working agent that makes authenticated tool calls on behalf of users, using GitHub as the example connector.
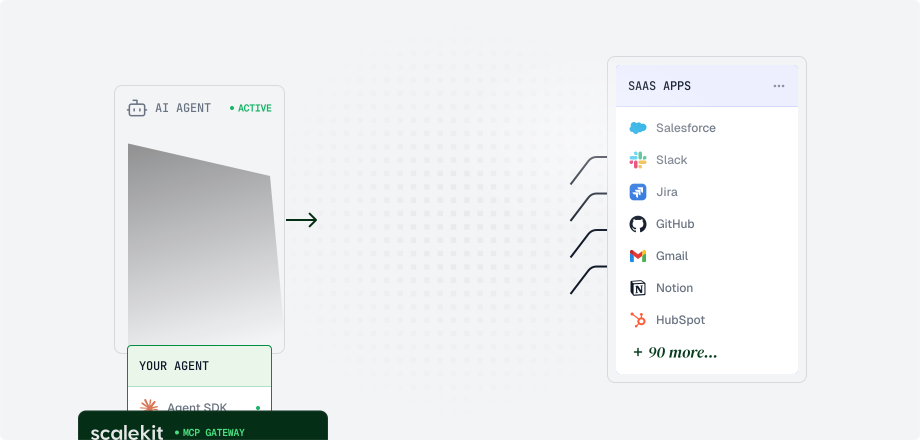
By the end of this guide, you’ll have a working agent that stars a repository on GitHub on behalf of a user (authenticated with their real account). Scalekit manages the OAuth flow, token storage, and API proxy so you focus on agent logic.
Before you start
Section titled “Before you start”Complete these steps in the Scalekit dashboard before writing any code:
-
Create a Scalekit account at app.scalekit.com.
-
Confirm the GitHub connection at Dashboard → AgentKit > Connections.
New Scalekit environments include a default GitHub connection named
github-connect, pre-configured with Scalekit’s managed credentials and theuser:email,repo, andpublic_reposcopes — no connector setup is needed for this quickstart.Copy the exact Connection name from that connection and use that value in your code. It must match the dashboard exactly; in older environments or renamed connections the value can differ from
github-connect. To connect to other services, create a connection for each app under AgentKit > Connections > Create Connection. -
Copy your API credentials at Dashboard → Developers → Settings → API Credentials. Save these values as environment variables:
SCALEKIT_CLIENT_IDSCALEKIT_CLIENT_SECRETSCALEKIT_ENV_URLGITHUB_CONNECTION_NAME(copy the exact Connection name from AgentKit > Connections —github-connectin new environments)
Build your agent
Section titled “Build your agent”Install the authstack plugin for your coding agent with npx @scalekit-inc/cli setup (or install globally with npm install -g @scalekit-inc/cli then scalekit setup), complete the browser authorization when prompted, then paste the implementation prompt. The agent scaffolds connected account setup, the OAuth flow, and tool execution.
npx @scalekit-inc/cli setupThe wizard sets up the right plugins and skills for your editors. Complete any browser authorization for the Scalekit MCP server when prompted. Then use the prompt below (or describe your goal in natural language).
Configure Scalekit agent authentication for GitHub. Provide code to create a connected account, generate an authorization link, and, once the user authorizes, star Scalekit's SDK repo (scalekit-inc/scalekit-sdk-python) using Scalekit's tool API.1. Set up your environment
Section titled “1. Set up your environment”Install the Scalekit SDK and initialize the client with your API credentials:
pip install scalekit-sdk-python python-dotenvnpm install @scalekit-sdk/nodeimport osfrom scalekit import ScalekitClientfrom dotenv import load_dotenvload_dotenv()
# Constructor: env_url, client_id, client_secretscalekit_client = ScalekitClient( os.environ["SCALEKIT_ENV_URL"], os.environ["SCALEKIT_CLIENT_ID"], os.environ["SCALEKIT_CLIENT_SECRET"],)actions = scalekit_client.actionsconnection_name = os.getenv("GITHUB_CONNECTION_NAME") # must match the Connection name in the dashboard exactlyimport { ScalekitClient } from '@scalekit-sdk/node';import { ConnectorStatus } from '@scalekit-sdk/node/lib/pkg/grpc/scalekit/v1/connected_accounts/connected_accounts_pb';import 'dotenv/config';
// Constructor: envUrl, clientId, clientSecretconst scalekit = new ScalekitClient( process.env.SCALEKIT_ENV_URL!, process.env.SCALEKIT_CLIENT_ID!, process.env.SCALEKIT_CLIENT_SECRET!);
const actions = scalekit.actions;const connectionName = process.env.GITHUB_CONNECTION_NAME!; // must match the Connection name in the dashboard exactly2. Create a connected account
Section titled “2. Create a connected account”Scalekit tracks each user’s third-party connection as a connected account. This is the record that holds their OAuth tokens. Creating it tells Scalekit to start managing the user’s GitHub access on your behalf. This step fails if the GitHub connection does not exist in AgentKit > Connections, or if connection_name / connectionName does not match the dashboard exactly.
# Create or retrieve the user's connected GitHub accountresponse = actions.get_or_create_connected_account( connection_name=connection_name, identifier="user_123" # Replace with your system's unique user ID)connected_account = response.connected_accountprint(f'Connected account created: {connected_account.id}')// Create or retrieve the user's connected GitHub accountconst response = await actions.getOrCreateConnectedAccount({ connectionName, identifier: 'user_123', // Replace with your system's unique user ID});
let connectedAccount = response.connectedAccount;console.log('Connected account created:', connectedAccount?.id);3. Authenticate the user
Section titled “3. Authenticate the user”Your agent can’t act on behalf of a user until they authorize access. Generate an authorization link, send it to the user, and Scalekit handles the rest: token exchange, storage, and automatic refresh. Once they complete the flow, the connected account status becomes ACTIVE.
# Generate authorization link if user hasn't authorized or token is expired.# Do not call tools until status is ACTIVE — wait for the user to finish OAuth first.if connected_account.status != "ACTIVE":    print(f"GitHub is not connected: {connected_account.status}")    link_response = actions.get_authorization_link(        connection_name=connection_name,        identifier="user_123",    )    print("🔗 click on the link to authorize GitHub", link_response.link)    input("⎆ Press Enter after authorizing GitHub...")    # Re-fetch so connected_account reflects ACTIVE status and a valid id    response = actions.get_or_create_connected_account(        connection_name=connection_name,        identifier="user_123",    )    connected_account = response.connected_account    # In production, redirect the user to this URL and resume after the OAuth callback
if connected_account.status != "ACTIVE":    raise RuntimeError(        "GitHub is still not ACTIVE. Complete authorization and try again."    )
// Generate authorization link if user hasn't authorized or token is expired.// Do not call tools until status is ACTIVE — wait for the user to finish OAuth first.if (connectedAccount?.status !== ConnectorStatus.ACTIVE) { console.log('GitHub is not connected:', connectedAccount?.status); const linkResponse = await actions.getAuthorizationLink({ connectionName, identifier: 'user_123', }); console.log('🔗 click on the link to authorize GitHub', linkResponse.link); console.log('Press Enter after authorizing GitHub...'); await new Promise<void>((resolve) => { process.stdin.resume(); process.stdin.once('data', () => { process.stdin.pause(); resolve(); }); }); // Re-fetch so connectedAccount reflects ACTIVE status and a valid id const refreshed = await actions.getOrCreateConnectedAccount({ connectionName, identifier: 'user_123', }); connectedAccount = refreshed.connectedAccount; // In production, redirect the user to this URL and resume after the OAuth callback}
if (connectedAccount?.status !== ConnectorStatus.ACTIVE) { throw new Error('GitHub is still not ACTIVE. Complete authorization and try again.');}Open the link in a browser and authorize the GitHub connection. Once complete, the connected account status updates to ACTIVE and your agent can act on the user’s behalf. In CLI samples, wait for that step (for example with input() or stdin) before calling tools — otherwise the first run fails because the account is still inactive.
4. Star a repo via tool call
Section titled “4. Star a repo via tool call”Pass the tool name and your inputs to Scalekit. It handles the request to GitHub and returns a structured response your agent can reason over directly: no endpoint URLs, auth headers, or response parsing required. The example stars the Scalekit SDK repo for your language.
# Prefer connected_account_id after authorize. If you use identifier instead,# also pass connection_name — the pair is required for account resolution.tool_response = actions.execute_tool( tool_name="github_repo_star", connected_account_id=connected_account.id, tool_input={ "owner": "scalekit-inc", "repo": "scalekit-sdk-python", },)# Tool output lives under dataprint(tool_response.data)const toolResponse = await actions.executeTool({ toolName: 'github_repo_star', connectedAccountId: connectedAccount?.id, toolInput: { owner: 'scalekit-inc', repo: 'scalekit-sdk-node', },});// Tool output lives under dataconsole.log('Starred the repo:', toolResponse.data);Verify it works
Section titled “Verify it works”Run your agent and confirm:
- The connected account status is
ACTIVEafter the user completes the GitHub OAuth flow. - The tool call returns success and the star appears on the Scalekit SDK repo on GitHub. Starring is idempotent — GitHub returns success even if the repo is already starred — so re-runs are safe. To confirm programmatically, call
github_starred_repos_listand check the repo is in the list.
If the connected account stays in a non-ACTIVE state, the user has not completed the OAuth flow. Regenerate the authorization link and try again.
Next steps
Section titled “Next steps”- Secure user verification: Confirm the OAuth identity matches your logged-in user before activating a connected account. Required for production.
- Connected accounts: Manage user connections across multiple providers.
- Tool calling: Use Scalekit’s optimized tools to call APIs without managing endpoints yourself.